How to Make Your Store Multilingual: Step-by-Step Guide (2025)

Adding multilingual functionality to your Shopify store isn’t just a nice-to-have—it’s a game-changer! It not only boosts engagement rates but can also drive significant increases in sales. By enabling customers to browse your website in their preferred language, you create a more seamless and personalized shopping experience, making it easier for them to confidently decide on their purchase.
Let’s dive into the step-by-step process of making your website multilingual!
If you’re short on time or prefer visuals, feel free to check out the video below instead of reading the full article:
Step 1: Download and install the “Shopify Translate & Adapt” App
The first step to making your Shopify store multilingual is to install an app that enables this functionality. While there are several apps available in the Shopify App Store, for this guide, we’ll focus on the Shopify Translate & Adapt app. The best part? It’s free and developed by Shopify itself!
With this app, you can translate almost every aspect of your Shopify store. It offers two main options:
- Manual Translation: Allows you to have full control over your content translations.
- Auto-Translate: Automatically translates your store’s content for you.
However, keep in mind that the Auto-Translate feature might occasionally translate some words or phrases inaccurately. If this happens, you can easily fix it by manually adjusting those translations within the app.
This app makes it simple and efficient to create a multilingual store, giving your customers a seamless shopping experience in their preferred language.
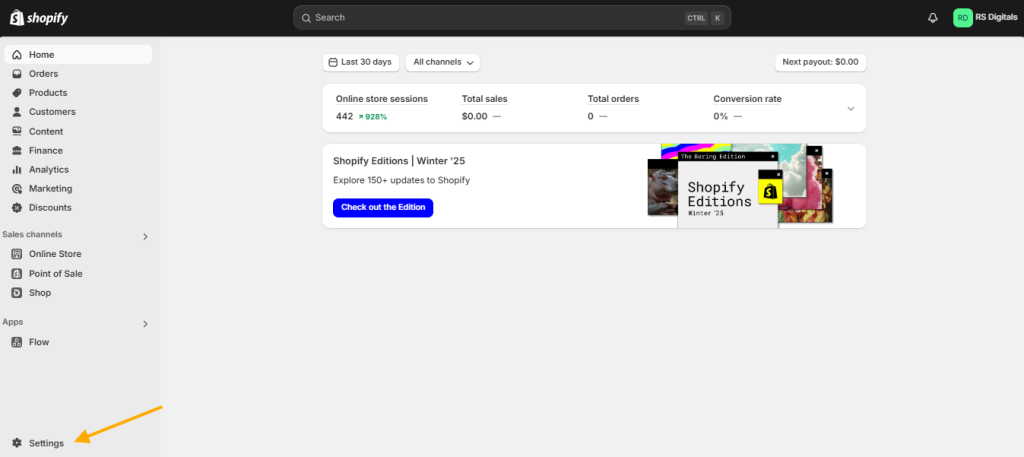
To install the “Translate & Adapt” app, start by clicking on Settings in your Shopify dashboard. Check out the screenshot below for a quick visual guide:
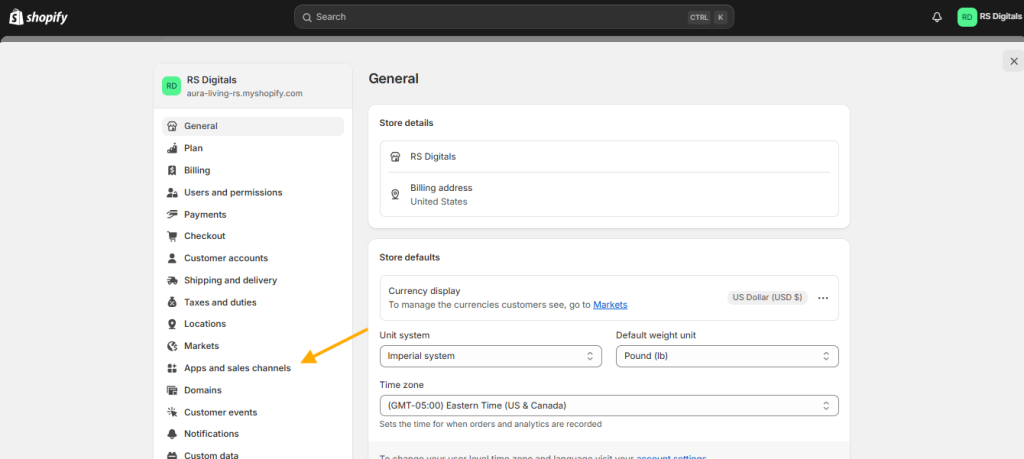
Head over to Apps & Sales Channels in your Shopify settings page and click on it. Take a look at the screenshot below for guidance:
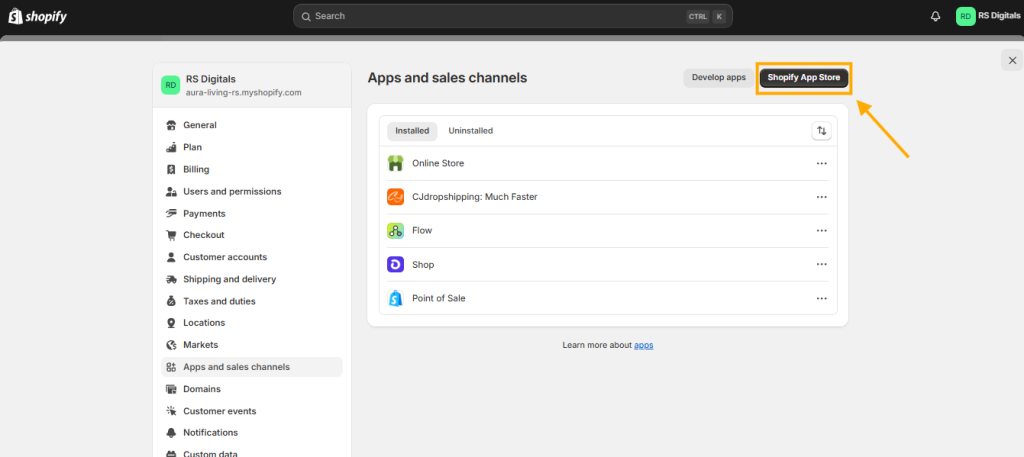
On the Apps & Sales Channels page, click the Shopify App Store button at the top-right corner to open the app store. Refer to the screenshot below for a visual guide:
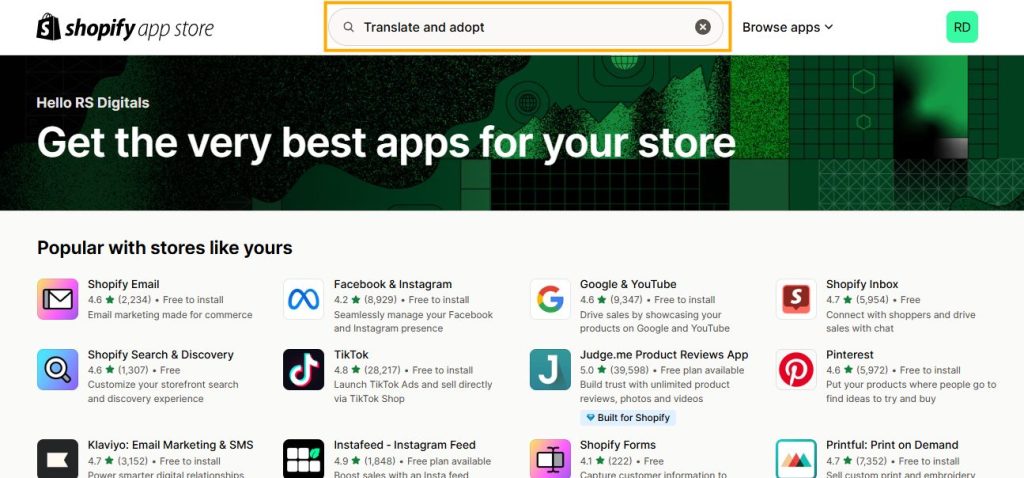
In the Shopify App Store, use the search bar to look for “Apps & Sales Channels.” Check out the screenshot below for a quick reference:
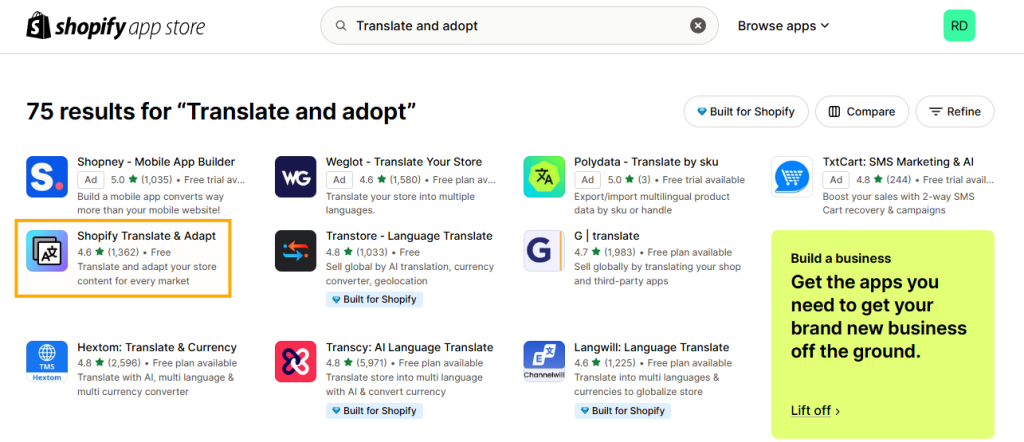
On the search results page, select the Shopify Translate & Adapt app. Refer to the screenshot below for guidance:
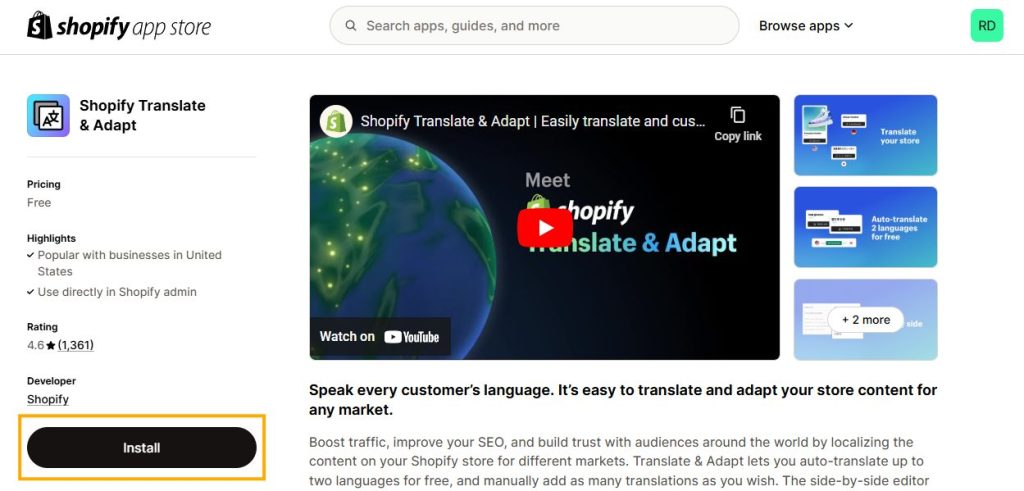
Now, click the Install button to add the Translate & Adapt app to your Shopify store. Check out the screenshot below for reference:
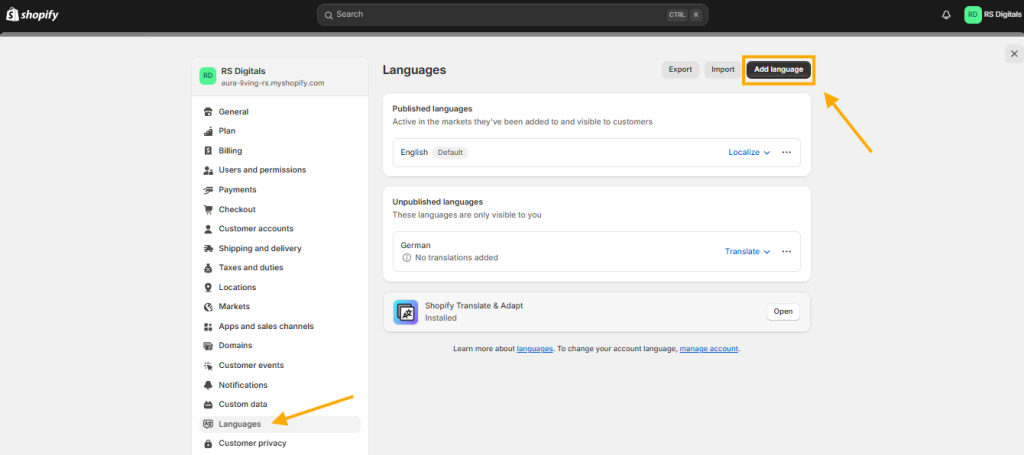
Congrats! You’ve successfully installed the Translate & Adapt app. Now, it’s time to add a second language to your store and make it multilingual! To get started, we first need to access the languages page. Here’s how you can do that:
- From your Shopify dashboard, click on Settings
- Go to Languages
- Click the Add language button to add a new language
Check out the screenshot below for visual guidance:
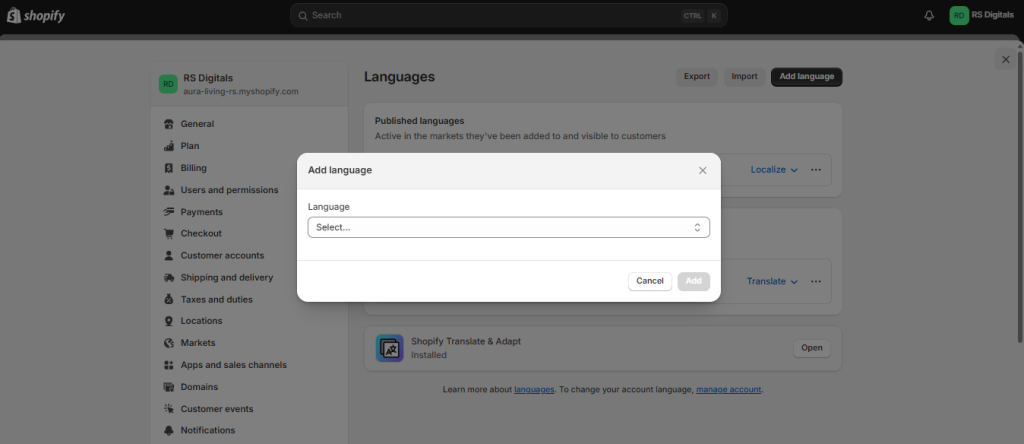
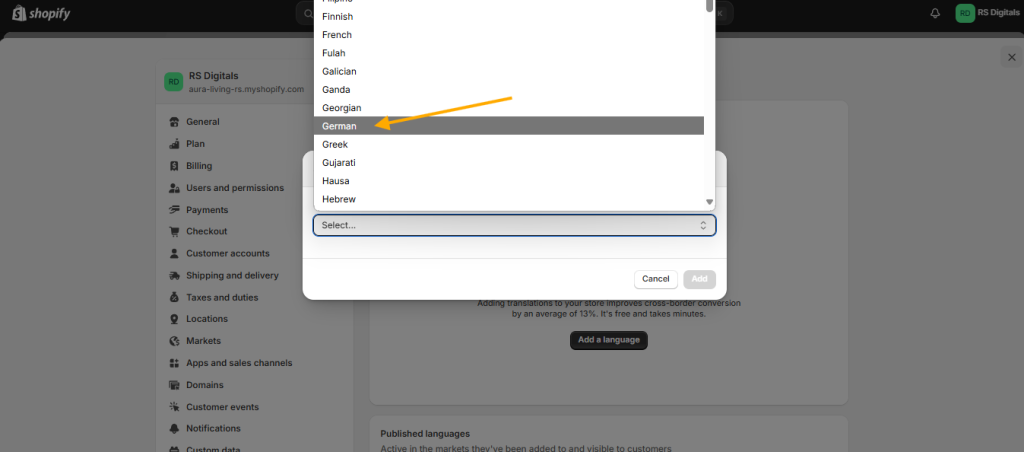
A pop-up will appear with a dropdown menu of all available languages. Simply select the language you want to add to your store. Check out the screenshot below for reference:
For this tutorial, I’ll be adding the German language. Check out the screenshot below for reference:
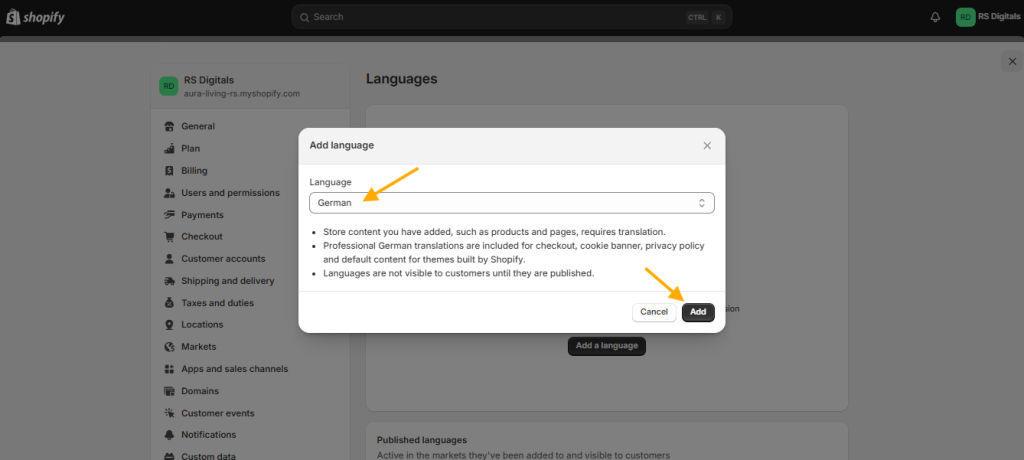
As you can see, I’ve selected the German language. Now, simply click the Add button to add the language to your store. Check out the screenshot below for reference:
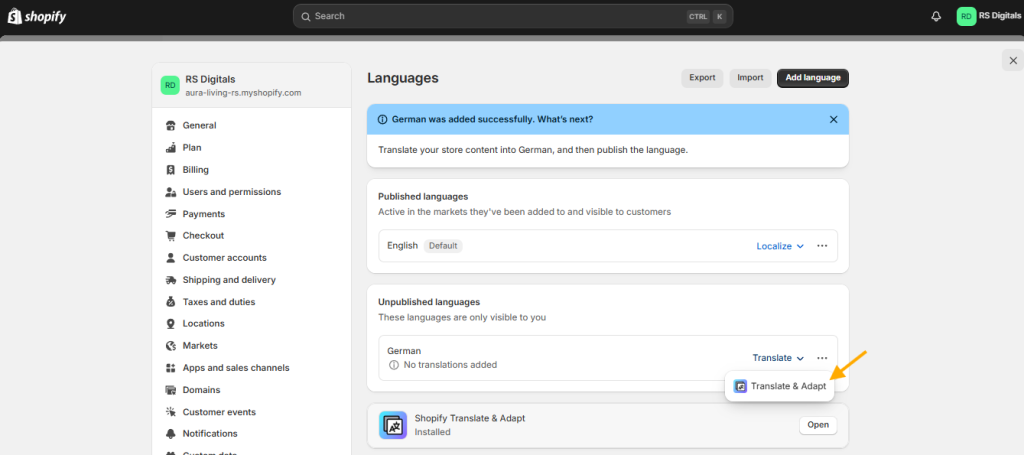
After adding the language, click on the Translate dropdown next to the language and select the Translate & Adapt app option. Check out the screenshot below for visual guidance:
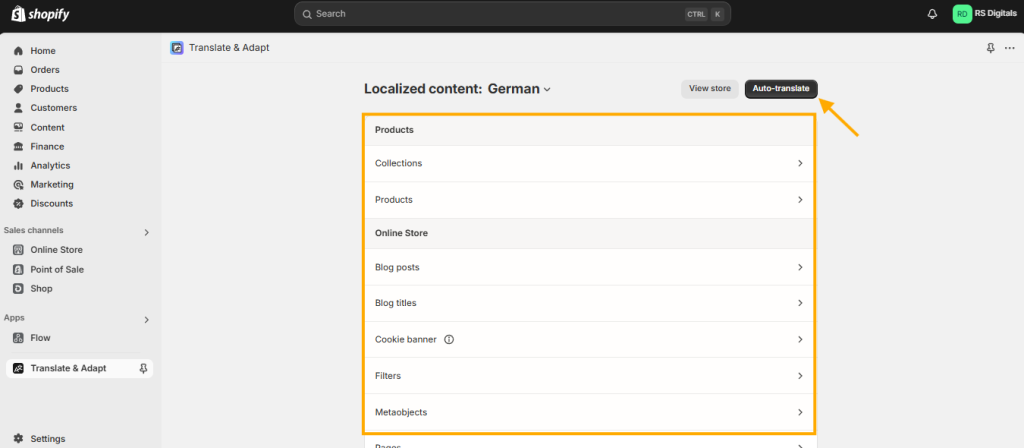
On the languages page, you can either use the auto-translate feature to quickly translate all your website content in just a few minutes or manually add translations by selecting options on the page.
I recommend using the auto-translate feature first, and then you can go back and fix any inaccurate translations. This will save you a lot of time. For this tutorial, I’ll be using the auto-translate feature.
Check out the screenshot below for visual reference:
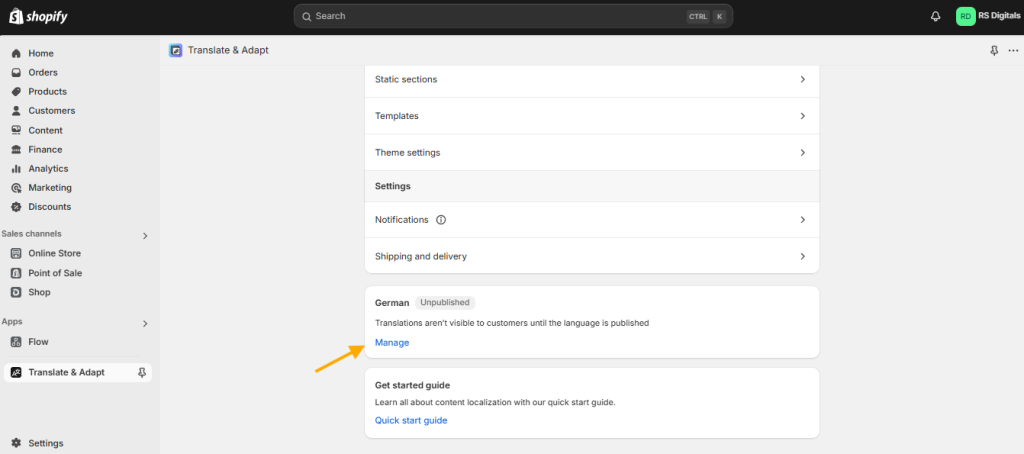
After adding the translation for the second language on your store, it’s time to publish it so your customers can see it. Here’s how you can do that: Scroll down to the bottom and click on Manage under the language name.
Check out the screenshot below for reference:
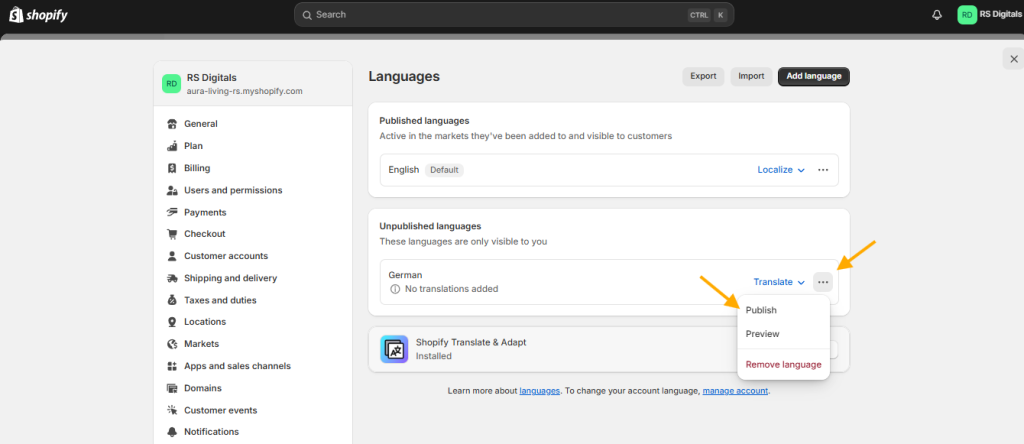
On the next page, click the three dots next to the language name and select the Publish option from the dropdown to make the language live. Check out the screenshot below for reference:
Now, there’s just one last thing to do: make sure the language selector is enabled in your theme editor. Without this, your store visitors won’t be able to see the language dropdown. Here’s how to enable it:
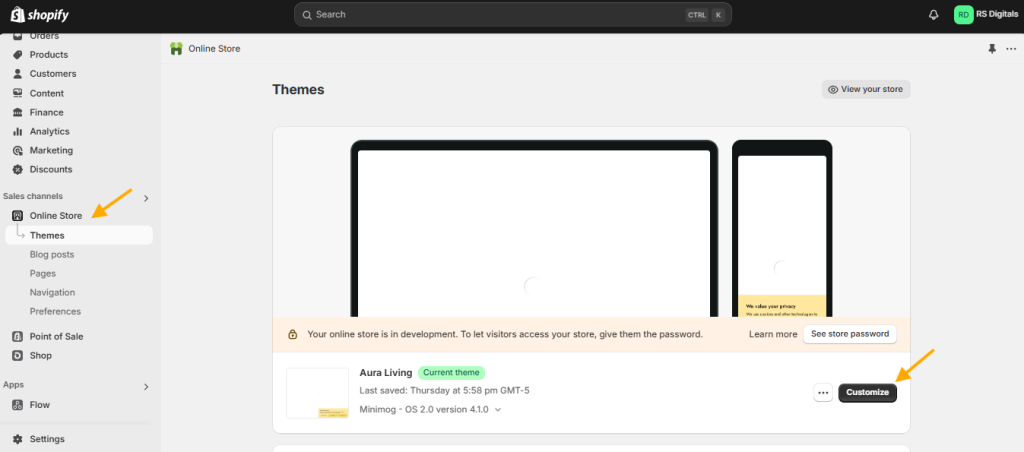
- Navigate to Online Store > Themes and click on it
- Click the Customize button to open the theme editor
Check out the screenshot below for visual guidance:
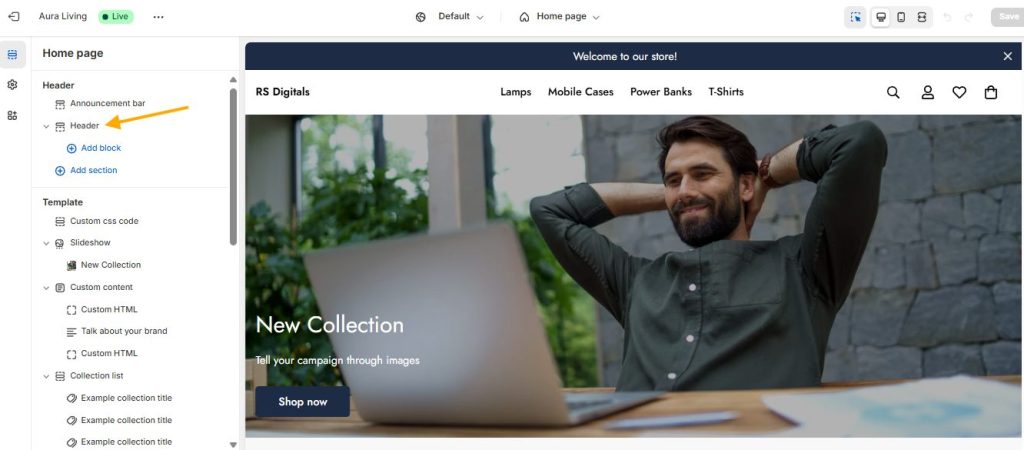
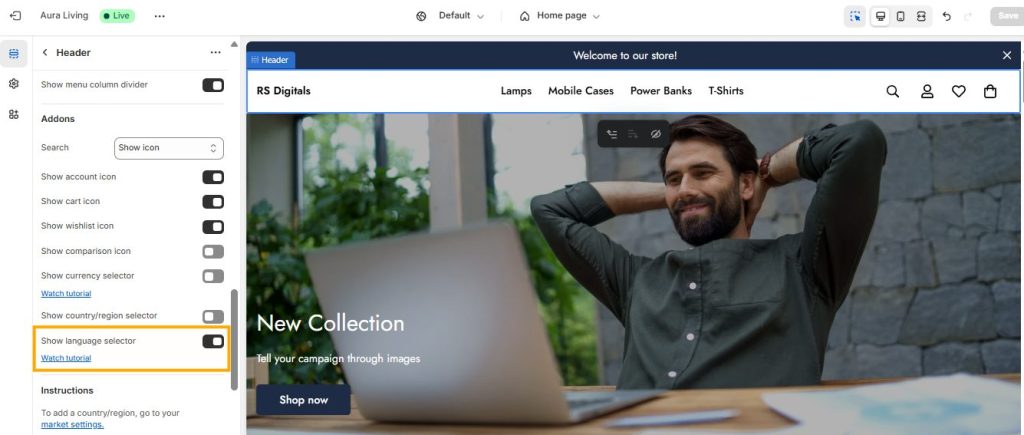
Now, if you want to display the language selector in the header, select Header from the left sidebar. For this tutorial, I’m using the Minimog Shopify theme. If you’re using a different theme, you may see slightly different options, but most of the latest Shopify themes have the language selector under the Header settings. Check out the screenshot below for reference:
In the Header settings, look for the Language Selector option and enable it. Check out the screenshot below for guidance:
You’ll now see the language dropdown in the header of your Shopify store, displaying all the languages you’ve published for your store. Check out the screenshot below for guidance:

Congratulations! You’ve successfully made your Shopify store multilingual, opening up your business to a global audience. With the Translate & Adapt app, adding and managing multiple languages has never been easier. This step is not only crucial for enhancing customer experience but also for driving sales and building a stronger connection with your audience worldwide.
If you have any questions or need assistance at any step, feel free to leave a comment below. We’re here to help!
